In this article, you will learn how to host a static website on Google Firebase for absolutely free. Firebase is one of the best hosting platforms for hosting apps and websites.
Table of Contents
Introduction to Google firebase
Firebase is a platform developed by Google to create mobile and web applications. firebase was founded in 2011, Google acquired in 2014 and now firebase is a feature platform of Google. Firebase is developed for application building and improving your app code. Google Firebase helps the developer to build and run successful apps. Build, Grow, and improving is the main purpose of the Firebase.
Why Google Firebase Hosting
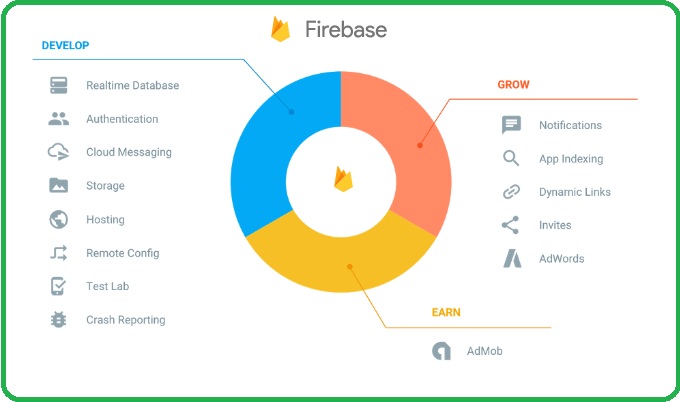
Firebase is a good choice to deploy static websites and Single Page Apps. Google Firebase is a fast, secure, and easy to use platform. It provides a very important feature to grow an application and earn with it. Here is an image that is strong enough to tell you the benefits of Google firebase-

For Configuration of Hosting, It required the following:
- Google Account: For Firebase setup account in the Console.
- Domain Details: Map your hosting service with the Domain.
- Firebase-CLI: you can install Firebase-CLI using the npm Command.
How to Host Static Website for Free: Step-by-Step
Step 1 – Configured Firebase project
Go to – Google Firebase and sign in using your Google Account.

Simply, Click on the < Add Project>

Let’s start with a name for your project. simply put your project name in my case I have written ( My First Project)

Simply, click on the Continue Button
( Tapping on the continue button means agreeing to the terms of Google Cloud Projects – such as deleting a Firebase project, also deleting Google Cloud projects, And all the Contained resources too. and you will not be able to undo it, although you will be able to manually disable most Firebase services.)

Again, Tap on the Continue Button.
(Tapping continue means that you are allowing Google analytics for your project. Google Analytics is a free and unlimited analytics solution that enables many features for your project such as in-app messaging, remote config, A/B Testing, etc..)

Click on the Add Firebase and,
The default Account will be taken for your project. also, you can create a new property for your project

Hurrey, Your new Firebase Project is Ready to show

Step: 2 Host your Application
Click on the Host ( as showing in the image)

Now, Add your website and tap on the Register app –

Simply click on the < Continue to the console>.
it’s asking to add the five basic SDK, we don’t need this information for our current demo.

Click on the < Get Started > to get Hosting for Registered app

1.Install Firebase CLI

2. Initialise your Project by copy and paste, the code into the Command line –

Deploy the Project.
For deployment of your project, you have to run the command “firebase deploy” and tap on the <Continue to the console>

Congratulations! your website is now live,
you can check by going to the URL which is provided in the command line

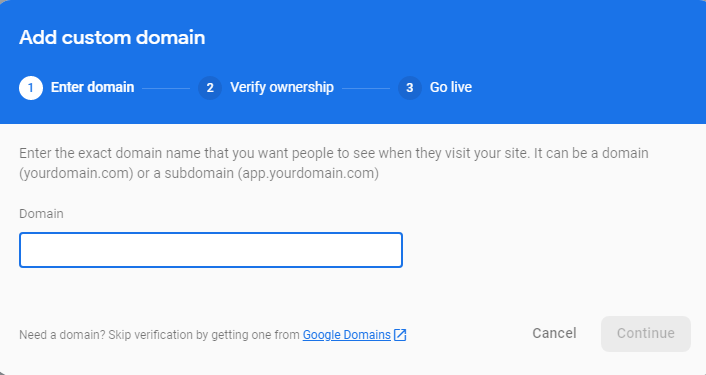
If you want to add your custom domain you can click on the <custom domain>. And to Add Custom Domain in Firebase you need to follow these three simple step-
- Enter the domain name
- verify ownership of your website or app
- Go live ( site will be published on Google)

Read more:- Apple iPhone 13: Apple is Removing the Charging Port?


